
After taking a closer look I understood my mistake and turned the hub the other way, so the brake lever was now facing upwards.

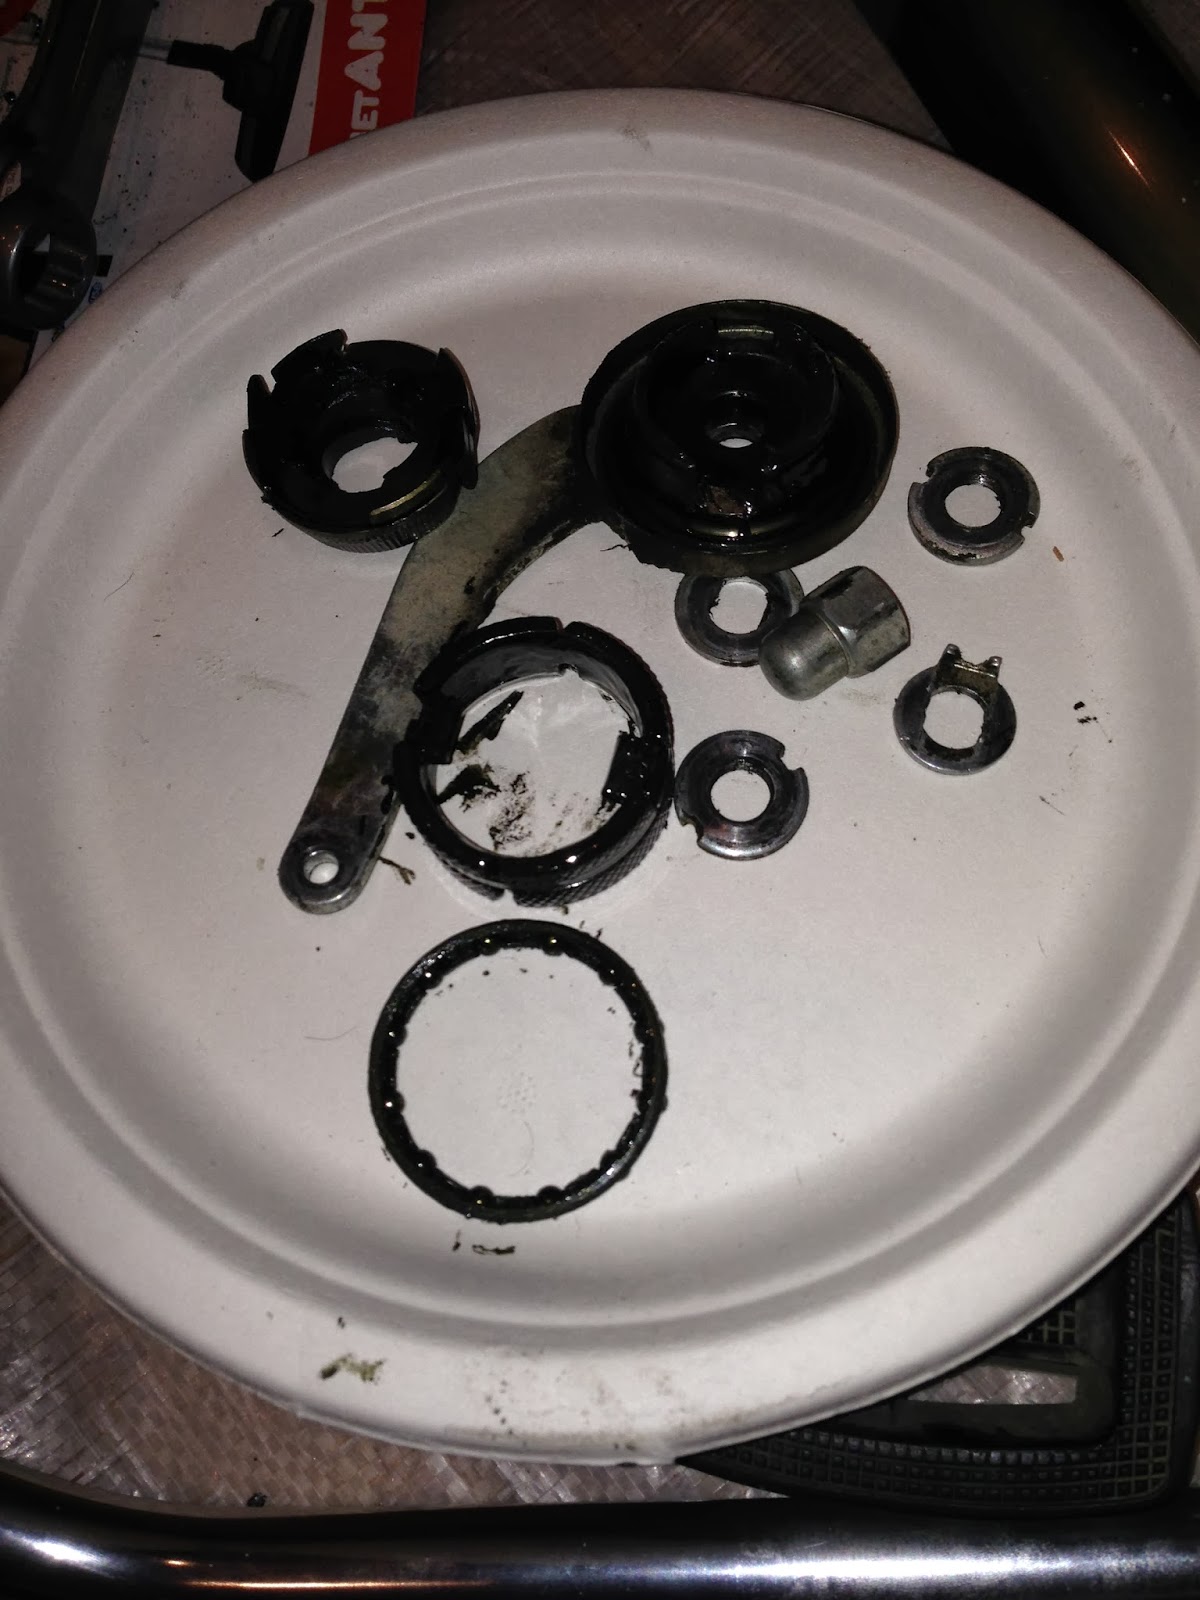
Before you start taking parts off, you should get two containers (disposable cardboard plates in my case), because you'll need to turn the hub around a couple of times as you proceed. If you keep the parts you took off from the left (brake lever) side apart from parts that came off the right side of the hub, you won't mix them and although this is no rocket science, I think it's good to keep things as simple as you can, so you can fully focus on the job rather than spend you time trying to remember what was where.
As you can see, the bike was probably never washed and there was a lot of scrubbing to come.

Start by unscrewing the cap nut that holds the wheel in the fork as well as the fixing plate underneath the cap nut. Undo the round lock nut.
Once you've done that, simply lift up the lever cone (brake lever together with the dust cover).

Looks dusty and not a lot of grease in there. Proceed by removing the ball bearing.


Remove the brake cylinder shown in the next picture.


Remove the braking cone assembly by lifting and twisting it simultaneously counterclockwise.

It'll come off very easily

Now it's time to turn the remains of the hub upside down. Unscrew the round lock nut and remove the fixed cone underneath it, that's holding the ball bearing in place.

As you unscrew the nut, you'll notice that the sprocket rises, that's because there's a pressure spring underneath it. There's also another one under the cone, it's narrow and it will go through the hole in the sprocket wheel. This spring is covered by a small cap, be sure not to lose it!


Remove the wide pressure spring. Make sure you place the parts in the appropriate trays, don't mix them. They might look a lot different after cleaning...

Also, note the position of the ball bearing, you'll need to place it the correct side up, when it comes to reassembling the hub. Now that the dust cap is gone, you can remove the ball bearing retainer ring with a help of the same small flat screwdriver you used to remove the dust cap. gently stick it underneath the retainer and use the leverage to lift the edge. Put a paper towel or a rag underneath so you don't lose the ball bearings that might fall off.

Now it's back to the axle. Remove the wide ball bearing ring sitting on top of the gear ring assembly and take a closer look at the clutch gear (top part of the ring gear ass'y) and the axle.


You'll notice two opposite holes (one slightly bigger than the other) in the clutch gear and an opening in the axle. You have to aline the holes with the opening by turning the gear assembly, to locate the sliding block (pin) situating in the bottom part of the opening. You can see the end of the pin through a bigger hole in the above picture.
You need to use a piece of wire or something similar (I used a wheel spoke) to push the pin out through the hole, but before that you have to unscrew the pull rod that is used to shift gears. The chain is connected to a narrow rod that's screwed into the sliding block. Unscrew the rod by turning the chain counterclockwise.
pull rod still connected

pull rod is now disconnected. Note the threaded end of the pull rod that can be seen through the hole in the axle, over the clutch gear

sliding block being pushed out with a wheel spoke

Now the ring gear assembly can be lifted off the axle. After that, turn the axle upside down again.


The only part left to remove is the planet wheel carrier assembly. Lift it off. Now you can see the sun gear on the axle.

Congratulations, the easy part is done! You are left with two trays of dirty gearbox parts that need to be cleaned.
I began with hot water, Fairy liquid (the best degreaser found in every household), a toothbrush and a brass wire brush for stubborn clay-like hardened mixture of grease and road dust.

After the first stage of cleansing, the parts look much better, but even after drying with paper towel and cotton sticks, there's still small water droplets in spots that cannot be reached. Also, Fairy won't be able to completely remove old grease. It's white spirit time


I poured a small amount of white spirit into plastic food container and cleaned each part throughly with a paintbrush that I dipped into the white spirit. The mineral spirit displaces water, you can see clear drops and shape-shifting blobs of water floating around in the white spirit that becomes pitch-black because of the dissolved grease remains. A lot of fine sand and metal shavings in there, too.

Rake your time and clean old grease residue everywhere you can reach, including between the planet gear teeth

Inspect the ball bearings for wear marks. If possible, replace them with brand new ones


I also took the time to polish the parts that would be still visible after assembly, like the break lever. Looks much better live than in the picture, you'll have to take my word for it

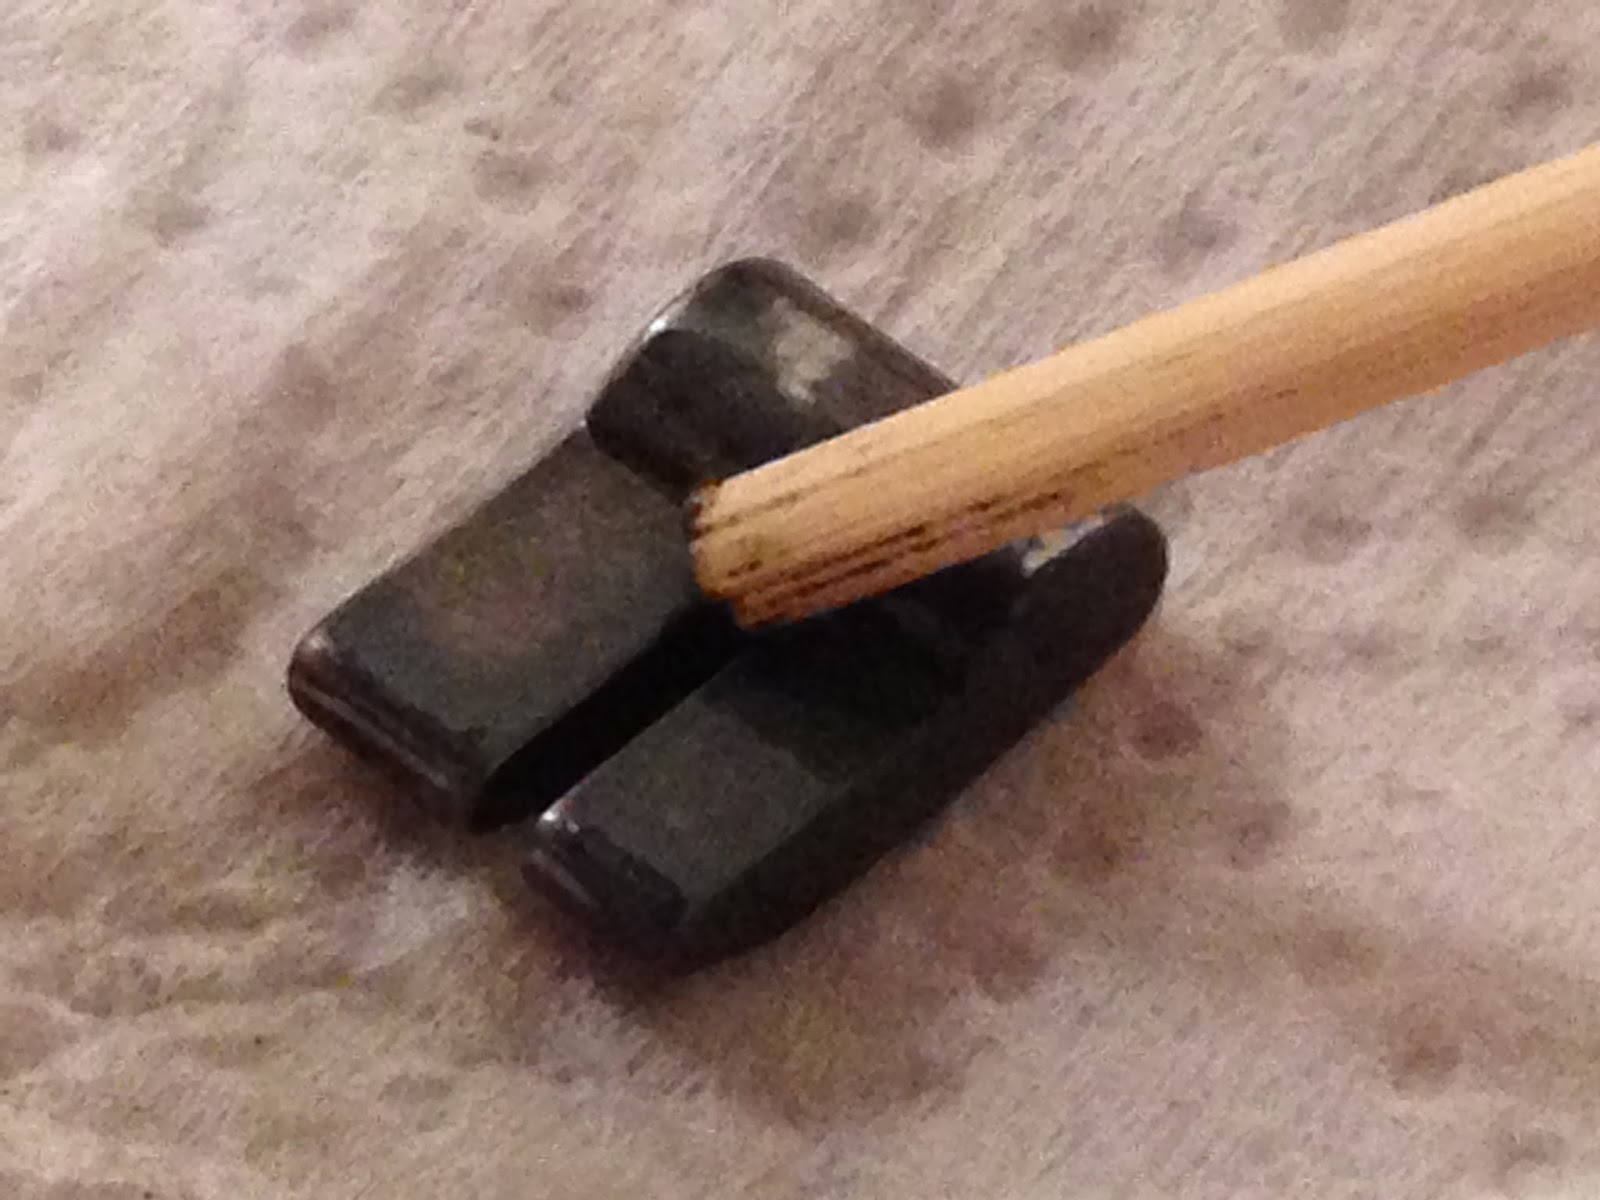
I noticed that some of the pawls won't move smoothly. They felt tacky and would rise slowly rather than quickly pop up. I took the circlip off, sprayed some WD40 on the parts and scrubbed the opposing surfaces with a dull end of a bamboo barbecue skewer. The residue that'd built up and prevented the free movement of the pawls then dissolved and the surfaces felt smooth and polished.

before

after

This lead me to inspect all the parts and surfaces that were hard to reach. Using WD40 and the same bamboo skewer's pointed end I dig and scrubbed wherever I thought could remain some hardened old grease.
Finally, I lightly sprayed all the parts with WD40 to prevent surface rust from forming overnight and also to soften the residue that I couldn't remove mechanically.
Remember to clean the hub shell also. You don't want to see al the trouble of unassembling and cleaning gears only to stick newly greased parts into the dirty and sand filled shell.

Now it's time to put it all together once again, with fresh grease. I used CRC branded lithium grease with molybdenum additive, that's recommended for automotive joints. However if you plan to ride your bike all year long including wintertime, it's better if you put solid lube only in the ball bearings and dip the gears in motor oil rather then greasing them. This way they won't freeze and the gears will continue functioning, but you'll need to oil the gears more often (or give them full service; after doing it couple of times it shouldn't be a problem)
Although it says on the lube tube that the grease will function up (or, actually, down) to -30 degrees Celsius, I still don't think it's a good idea to put this kind of lubricator in a mechanism that's supposed to do anything more than just rotate smoothly. But as I am going to only use this bike during warm months, the automotive joint grease will work for me.


Start with greasing the sun gear.

Next, grease the planet wheel carrier ass'y and drop on top of the axle until the sun gear and planet wheels interlock.

Add the thrust washer

And lock with the lock washer


Aline the opening in the axle with the holes in the clutch gear. Insert the sliding block through the bigger hole, flat side should face upwards. The sliding block is fully inserted when the gear ring assembly is able to turn on the axle


Add the pressure springs, don't forget to put the cap on top of the narrow one.

Take the sprocket wheel and grease well the part holding the ball bearing.

If you look closely, you'll see the ball bearing buried in grease.

I found out that this spring is much easier installed this way rather than sticking it on the axle

Now add more grease to the opposite side of the driver

And insert the ball bearing. After the ball bearing is in place, you have to cover it with the small dust cap. I haven't got a picture of it, but it's the only thing that fits here, so you cannot mess up. Be sure to install it! Otherwise you'll be doing this all over again very soon.

Then add the fixed cone


Tighten lightly.


Then, add the braking cone assembly. Turn counterclockwise as the part lowers on top of the planet wheel carrier.

Grease lightly

And put the hub/wheel back on.

Brake cylinder goes in next

Turn the assembly back and forth carefully so the break cylinder drops all the way in.

Ball bearing should be flush with the hub

Now, the break lever and dust cap assembly. Turn it as well, so the part sets in properly

Lock nut is up next. Tighten very carefully, only until there's no vertical movement in the axle. Do not over-tighten, there shouldn't be any stress on the ball bearings, or your wheel won't spin properly. The bike will be hard to ride and you'll wear your bearings and gears.
 Then the lock washer


Finally, I lightly sprayed all the parts with WD40 to prevent surface rust from forming overnight and also to soften the residue that I couldn't remove mechanically.
Remember to clean the hub shell also. You don't want to see al the trouble of unassembling and cleaning gears only to stick newly greased parts into the dirty and sand filled shell.

Now it's time to put it all together once again, with fresh grease. I used CRC branded lithium grease with molybdenum additive, that's recommended for automotive joints. However if you plan to ride your bike all year long including wintertime, it's better if you put solid lube only in the ball bearings and dip the gears in motor oil rather then greasing them. This way they won't freeze and the gears will continue functioning, but you'll need to oil the gears more often (or give them full service; after doing it couple of times it shouldn't be a problem)
Although it says on the lube tube that the grease will function up (or, actually, down) to -30 degrees Celsius, I still don't think it's a good idea to put this kind of lubricator in a mechanism that's supposed to do anything more than just rotate smoothly. But as I am going to only use this bike during warm months, the automotive joint grease will work for me.


Start with greasing the sun gear.

Next, grease the planet wheel carrier ass'y and drop on top of the axle until the sun gear and planet wheels interlock.


And lock with the lock washer

Add more grease to the planet wheels. Now, turn upside down and install the gear ring assembly.


Aline the opening in the axle with the holes in the clutch gear. Insert the sliding block through the bigger hole, flat side should face upwards. The sliding block is fully inserted when the gear ring assembly is able to turn on the axle


Add the pressure springs, don't forget to put the cap on top of the narrow one.

Take the sprocket wheel and grease well the part holding the ball bearing.

If you look closely, you'll see the ball bearing buried in grease.

I found out that this spring is much easier installed this way rather than sticking it on the axle

Now add more grease to the opposite side of the driver

And insert the ball bearing. After the ball bearing is in place, you have to cover it with the small dust cap. I haven't got a picture of it, but it's the only thing that fits here, so you cannot mess up. Be sure to install it! Otherwise you'll be doing this all over again very soon.


And the lock nut

Tighten lightly.

If you still have your gear shifter chain, you can install it now. Just drop the pull rod into the axle until it meets with the sliding block, start turning clockwise and once the threads in the sliding block meet with the ones on the shifter pull rod, you're golden

Turn upside down and grease the "threaded" portion of the planet wheel carrier ass'y.

Then, add the braking cone assembly. Turn counterclockwise as the part lowers on top of the planet wheel carrier.

Grease lightly

And put the hub/wheel back on.

Brake cylinder goes in next

Turn the assembly back and forth carefully so the break cylinder drops all the way in.

Ball bearing should be flush with the hub

Now, the break lever and dust cap assembly. Turn it as well, so the part sets in properly

Lock nut is up next. Tighten very carefully, only until there's no vertical movement in the axle. Do not over-tighten, there shouldn't be any stress on the ball bearings, or your wheel won't spin properly. The bike will be hard to ride and you'll wear your bearings and gears.


And another lock nut. This one you can tighten well, but the first lock nut shouldn't move any further down.

Et voilà, you've done it!
Just fix the complete wheel to the rear fork and enjoy your smooth ride.
BluesPre (c) 2014
Nice photos. These good old F&S hubs are almost invincible. I've serviced few three, five or seven speed hubs by Sachs and also by Sturmey-Archer so i came into conclusion that brits are good in complicating simple things and germans are good engineers. Believe me - disassembly of rusty-dusty hub by Sachs is easy as pie compared to Sturmey-Archer - german hub needs only vice and 17 size wrench, but english requires vice, drift punch, hammer, plenty of wd40 and patience.
ОтветитьУдалитьYou've putted hell of a grease in there, man, but You forgot to lubricate brake shoe. ;)
My recommendation is good graphite grease for gears, lithium for bearings and transmission oil (f.i. 85w90) on rest of surfaces (pawls especially).
Props for Your new-old shiny hub.
Thanks man, appreciate the comment. Actually, there was so much grease by the time I got to the brake cylinder that there wasn't any need for further greasing the cylinder - there was plenty of excess grease already available inside :)
УдалитьThe sole purpose of this whole "blog" is to help a fellow bike enthusiast to get through the disassembly/reassembly without unnecessary bruises and problems. And also to have a handy online guide, should I decide to service a similar hub again :)
Maybe, you should make your own guide servicing the Sturmei-Archer ones?
Cheers, be safe